GeoAI User Manual
Introduction
This guide will help you understand the GeoAI user flow to get started with your geospatial AI projects.
Step-by-Step User Guide
Step 1: Start Your Project
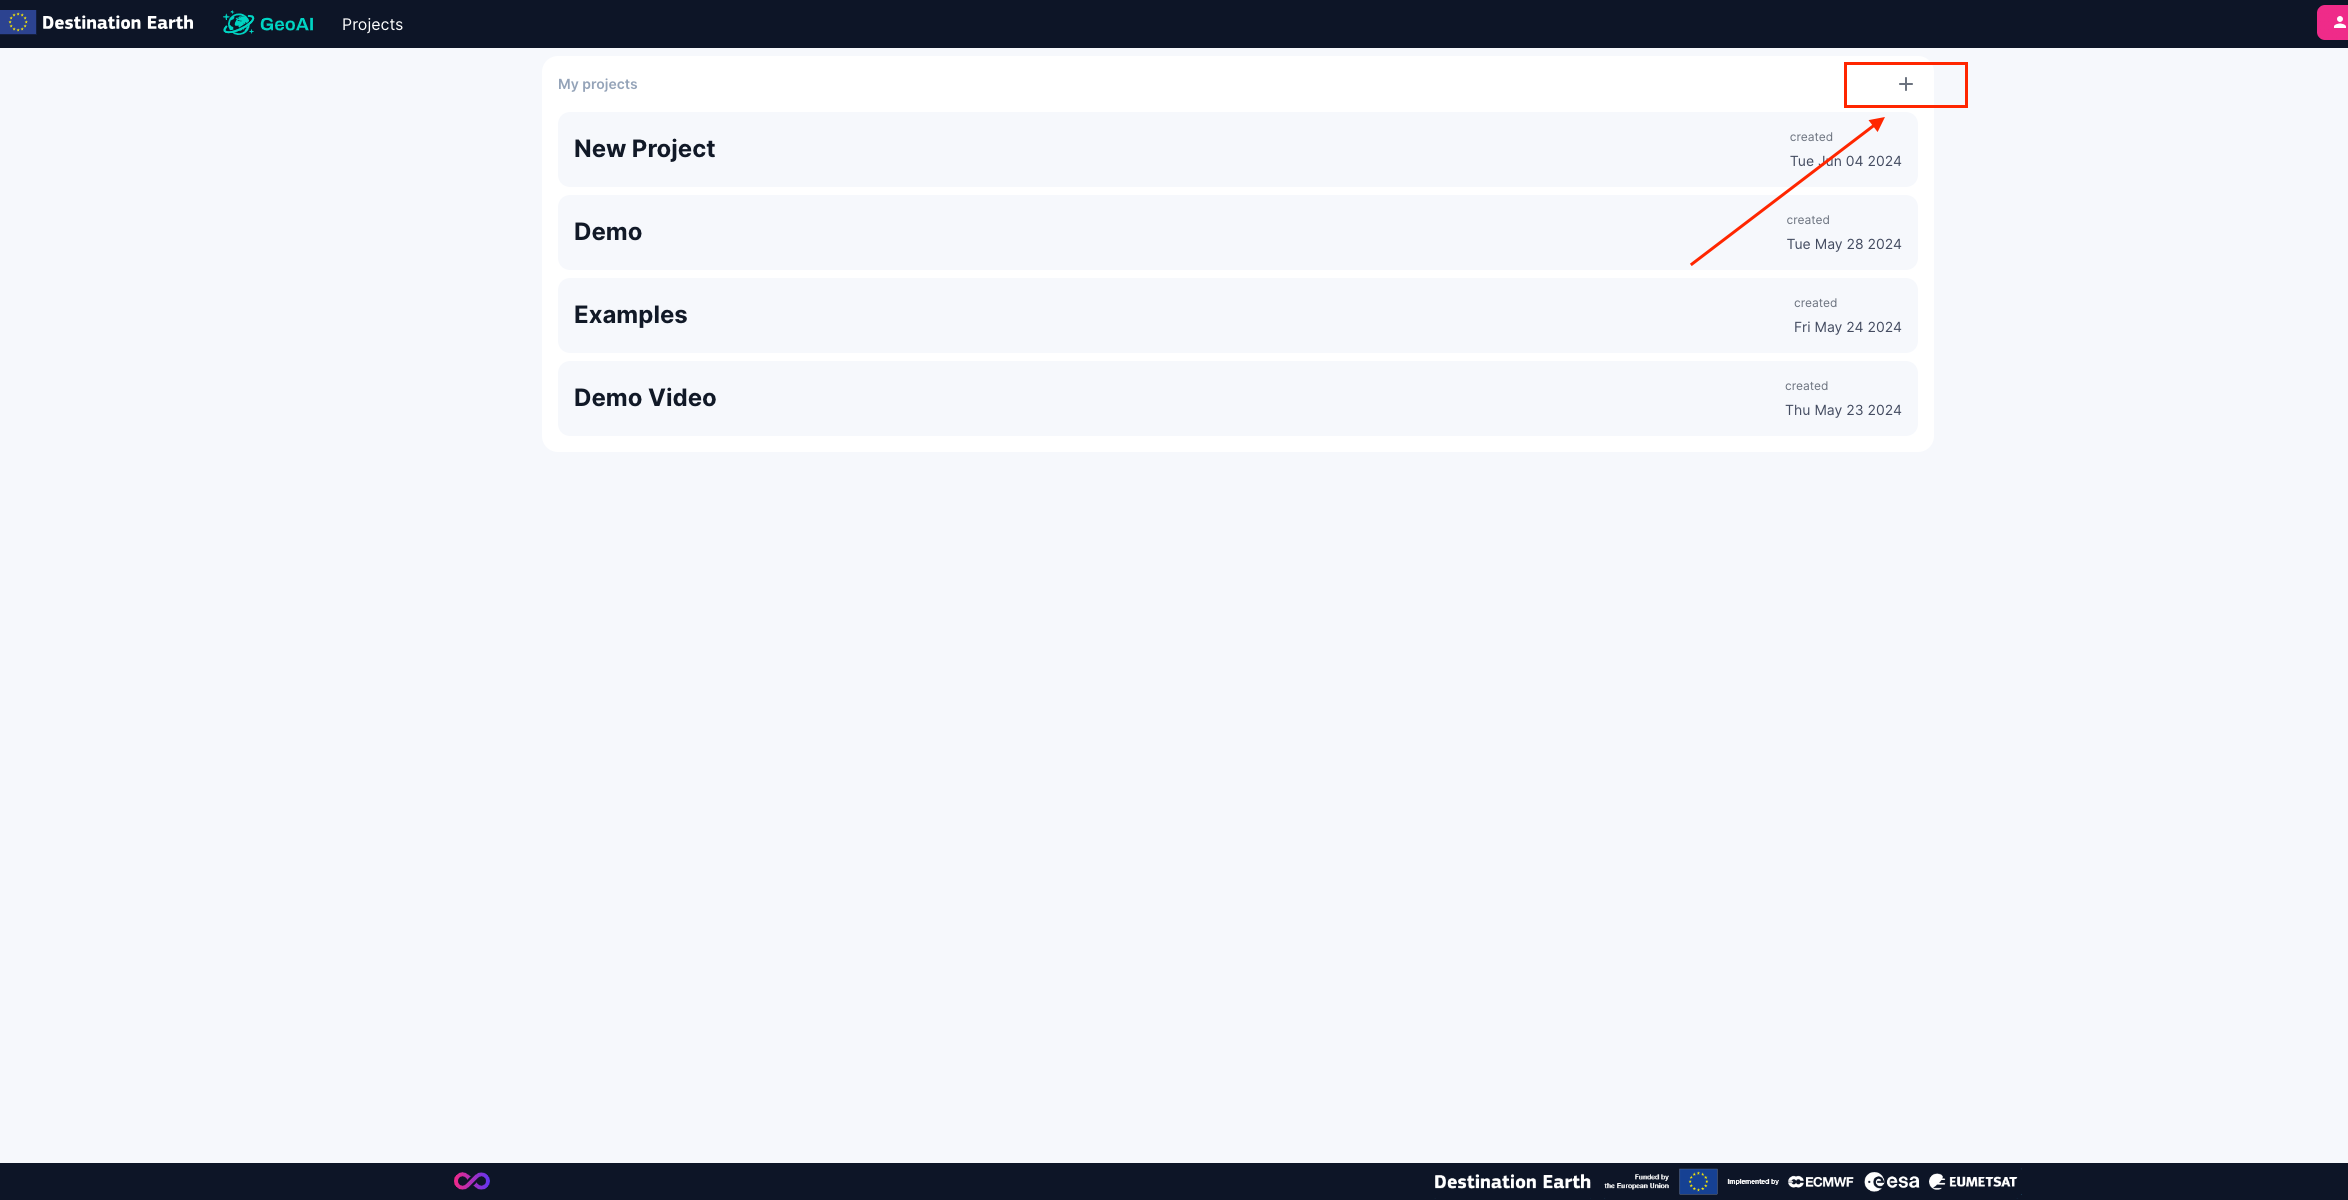
Create a New Project:
Navigate to the GeoAI dashboard.
Click on the “Create New Project” or “+” button.
Step 2: Upload Earth Observation Data
Upload Data:
Select the data source you want to upload. The file should be a georeferenced TIFF.
Click on the “Upload” button and select the file from your local storage or simply drag and drop the file in the selected area. Maximum file size is limited to 2GB.
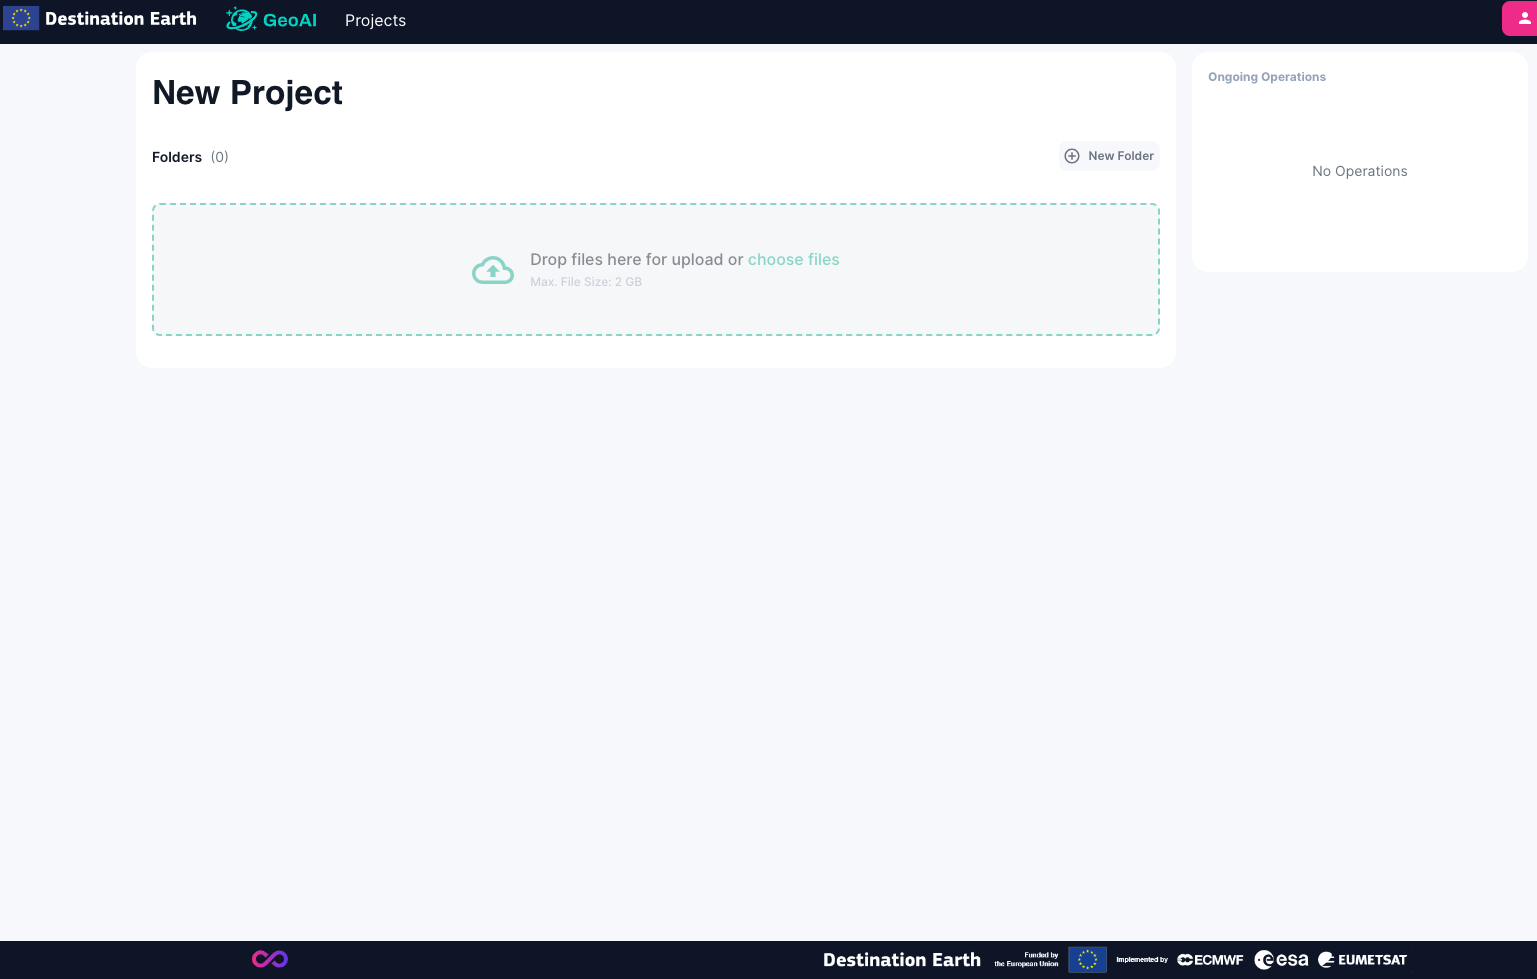
Note: The upload time may vary depending on your network speed.
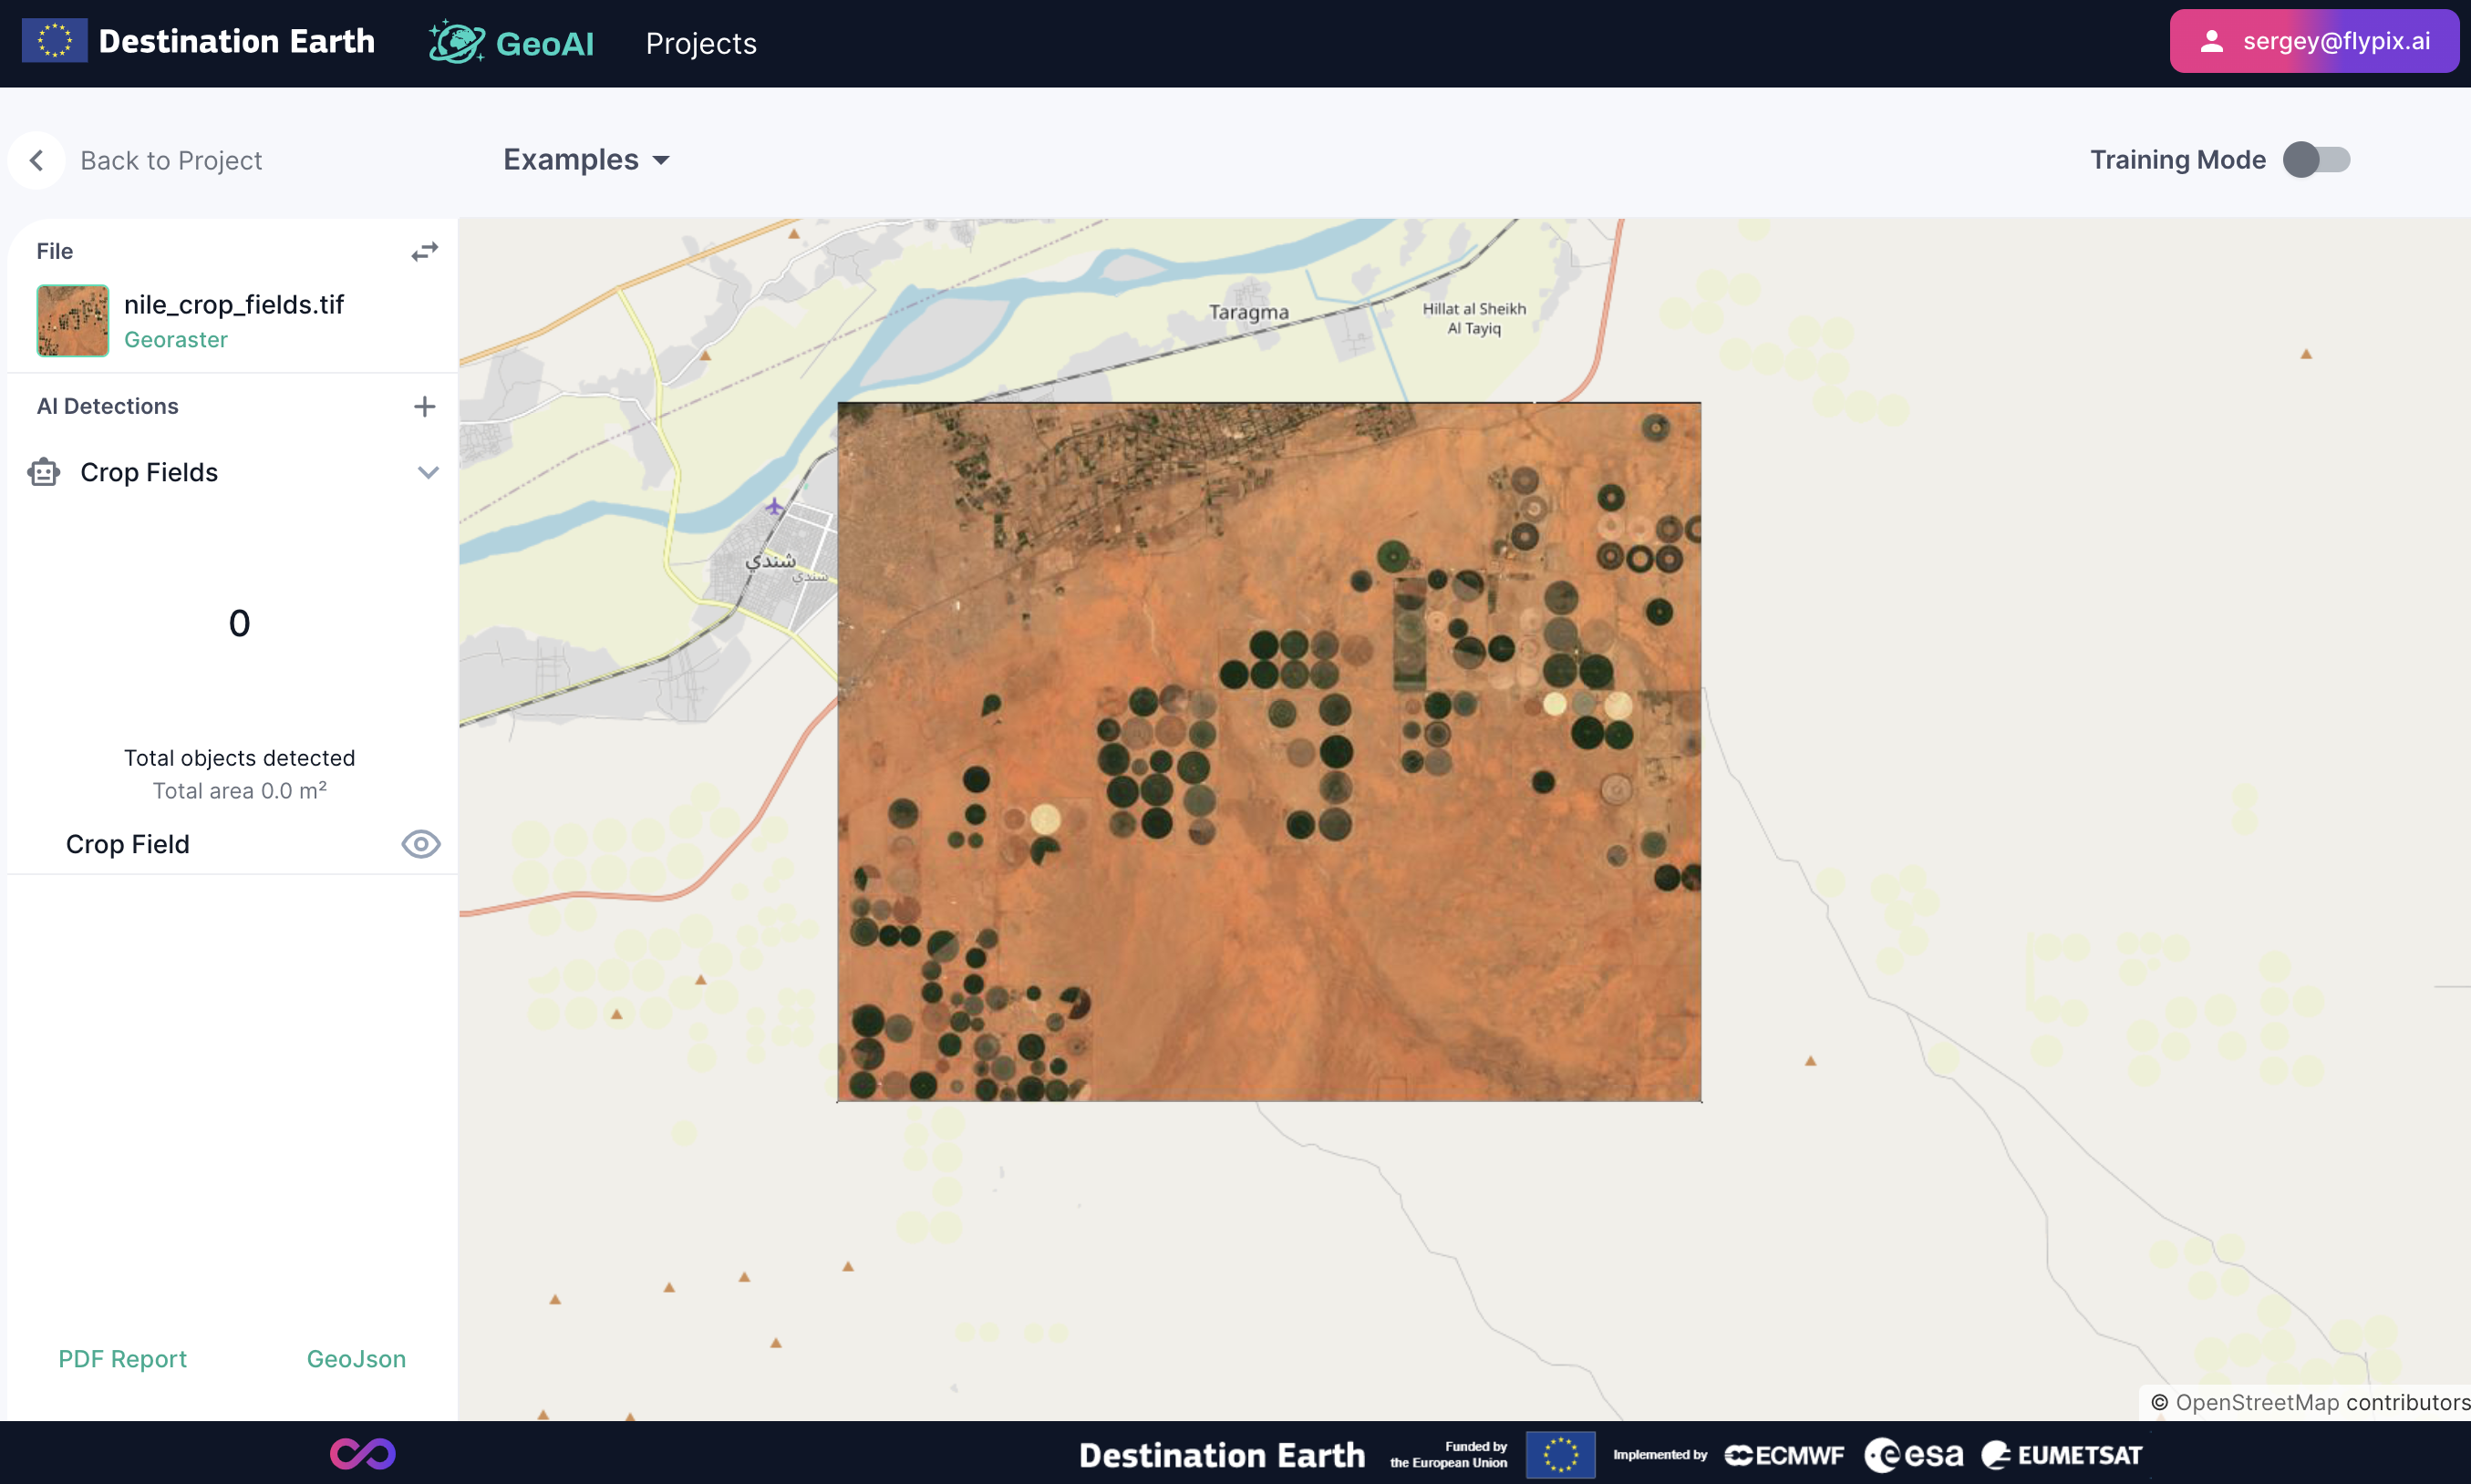
View and Interact with Raster:
Once the raster file is uploaded, you can view it using the map tools provided by GeoAI.
Use the zoom, pan, and other navigation tools to explore the raster image.
Step 3: Detecting Crop Fields
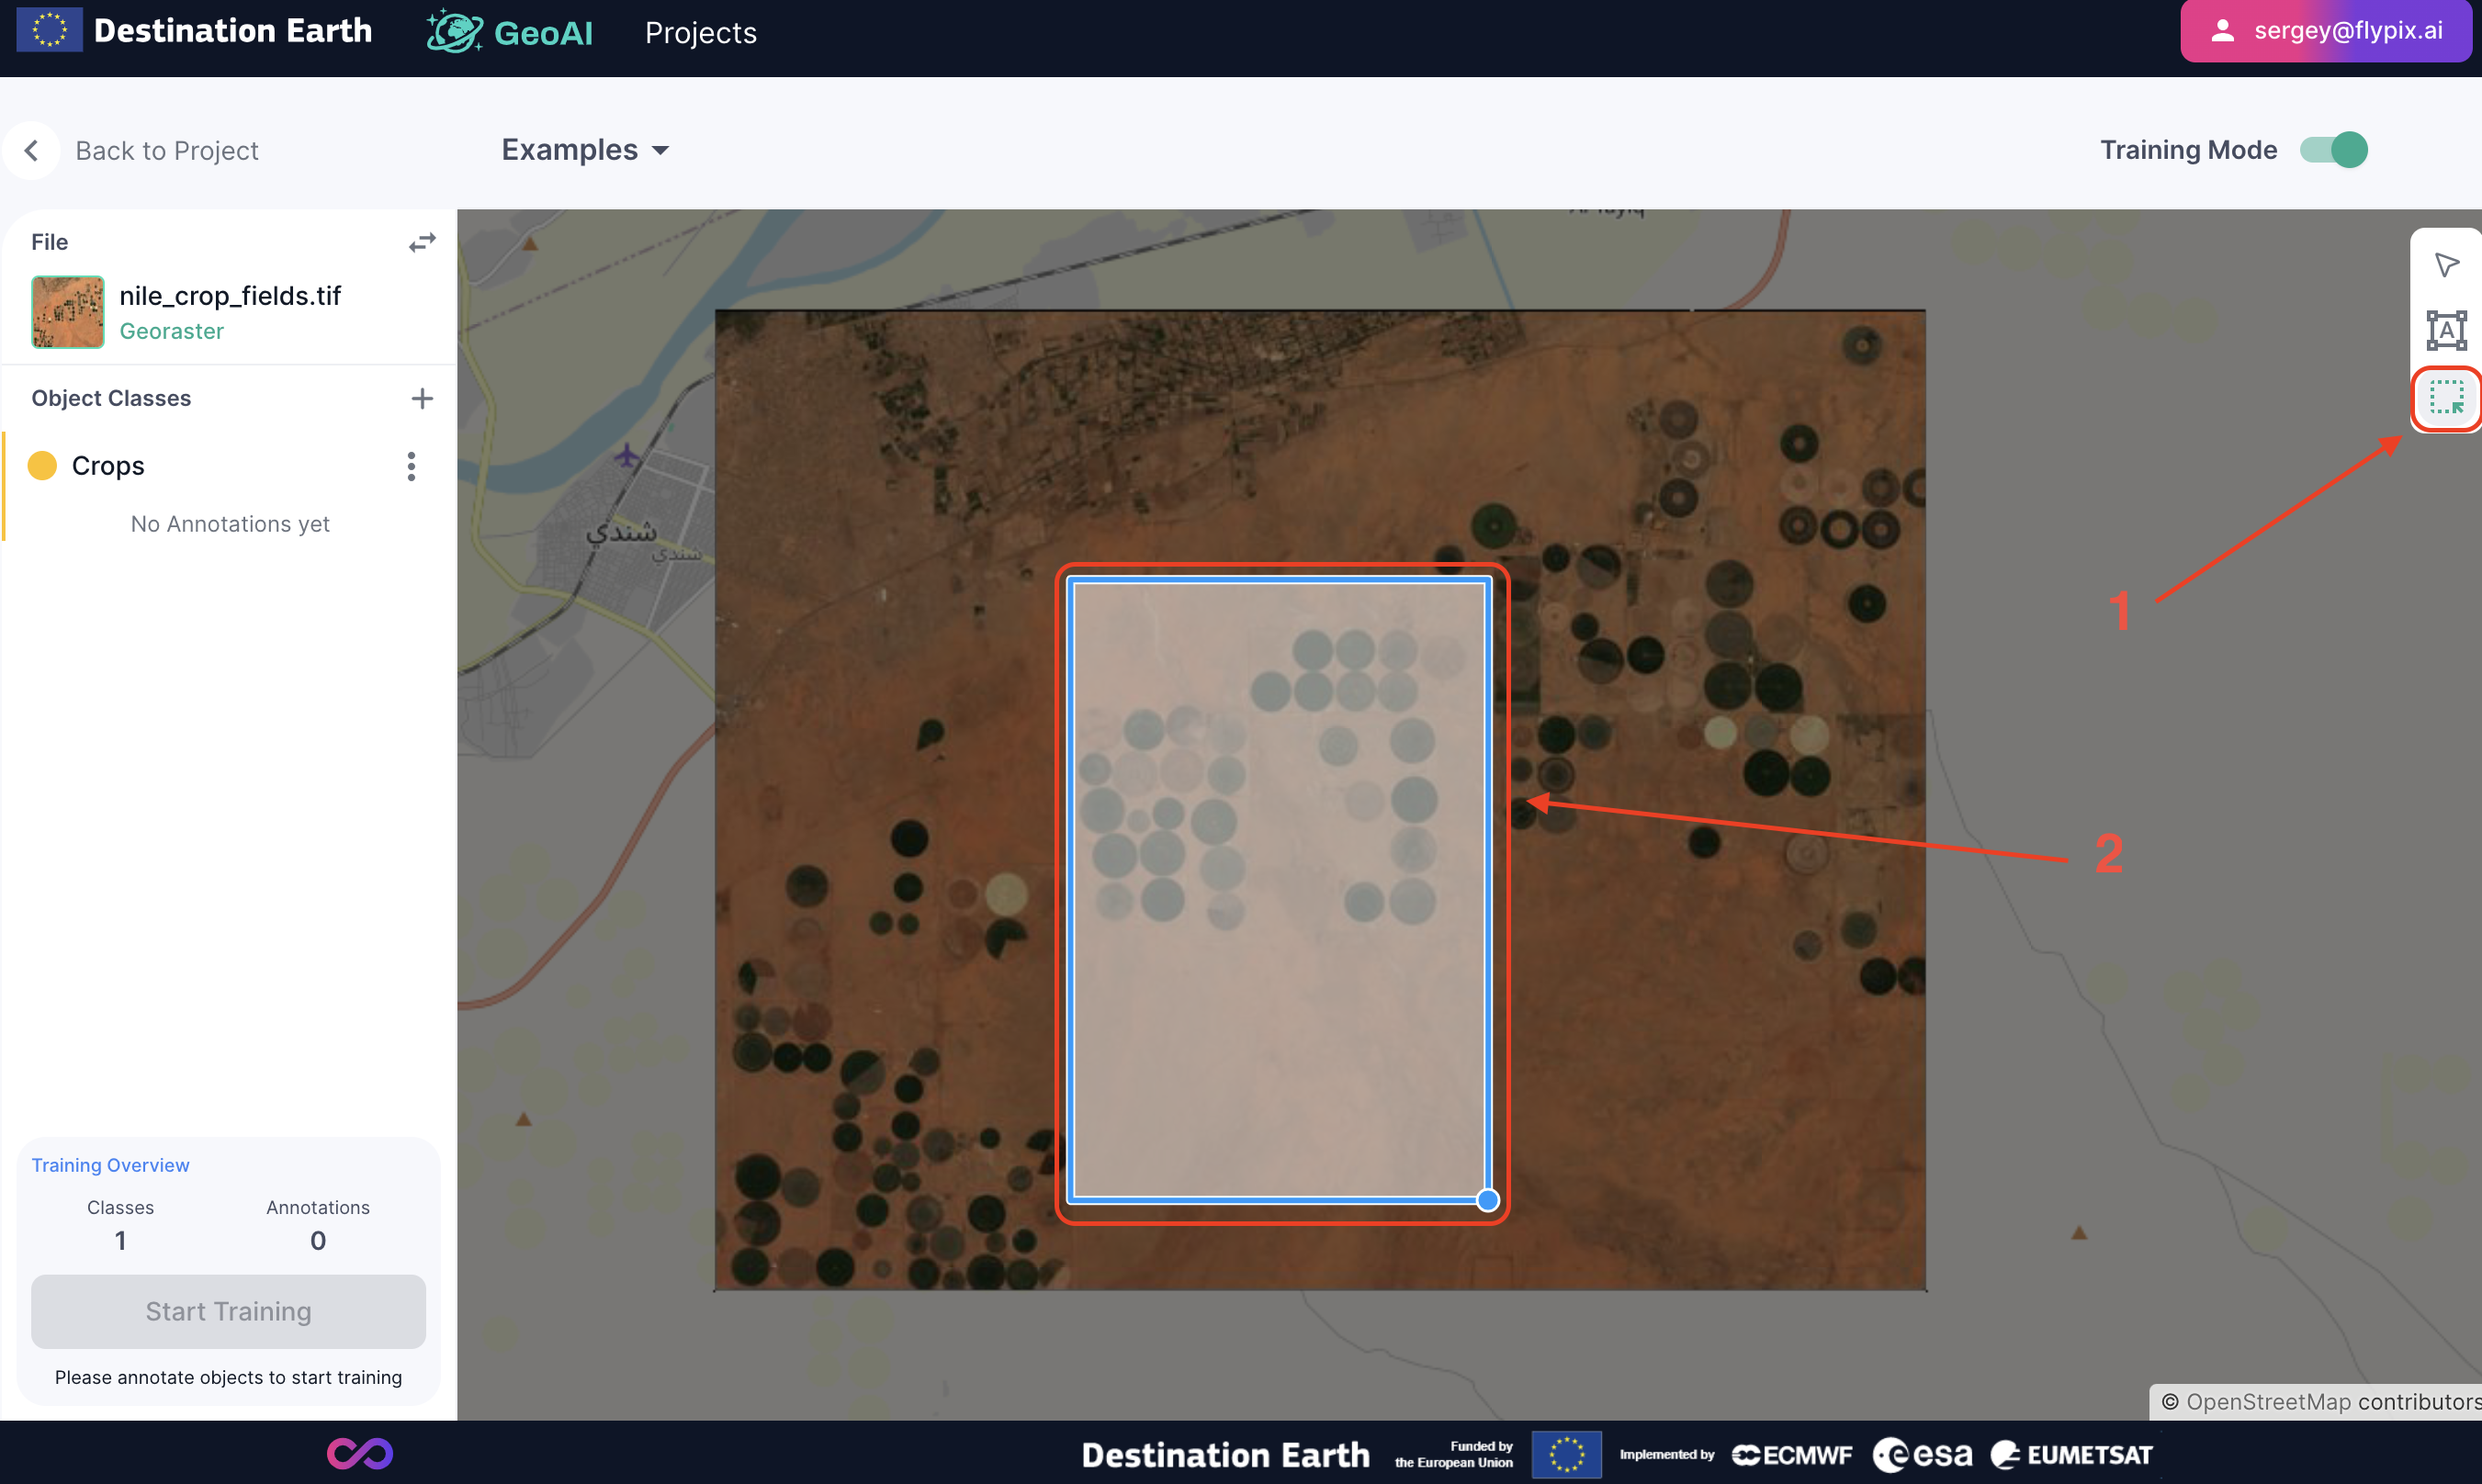
Training Mode:
Switch the selector to “Training Mode”.
Click on “Create New Class” or “+” and name it “Crops”.
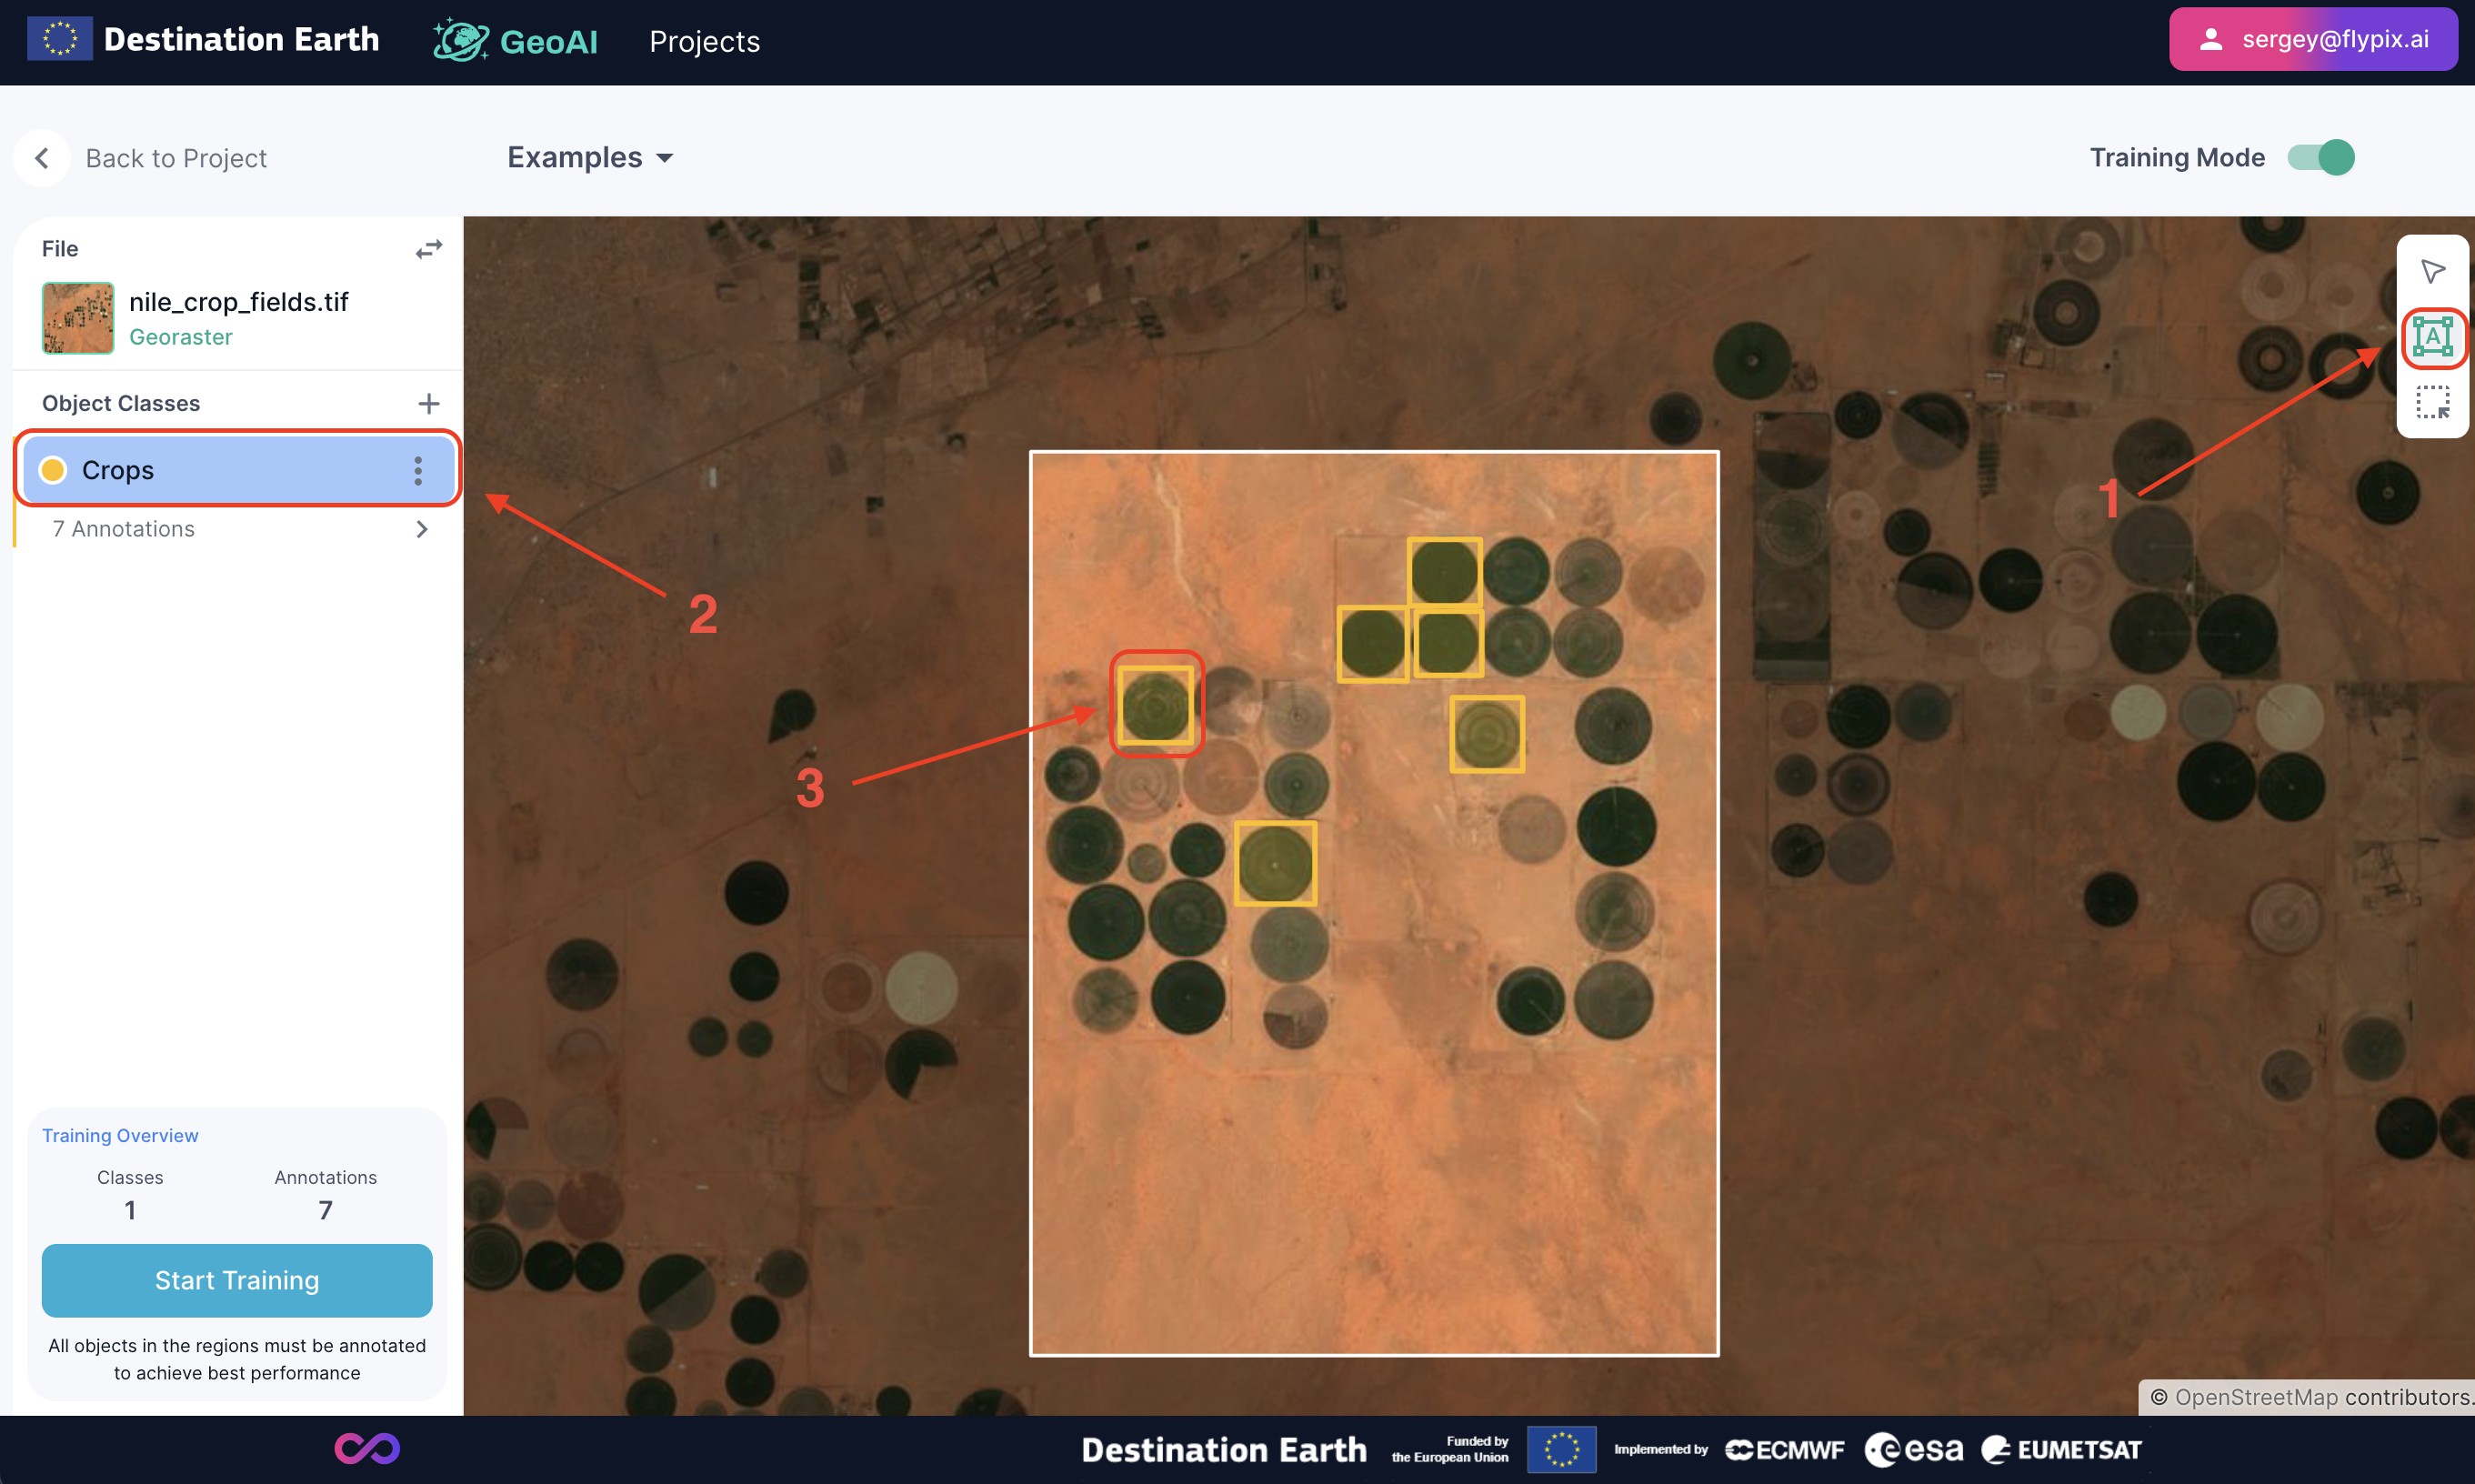
Provide Examples:
Select on a toolbar “Draw region” button (1) and draw the region on the raster (2) that contains objects for annotations. You can later draw more regions. The more annotation is provided the better model performance is.
Select on a toolbar “Annotate” button (1), select an annotation class in our case it Crops (2), draw annotation polygons (3).
Start Training:
After marking the examples, click on the “Start Training” button. In the pop up window provide the name of the model and confirm the training.
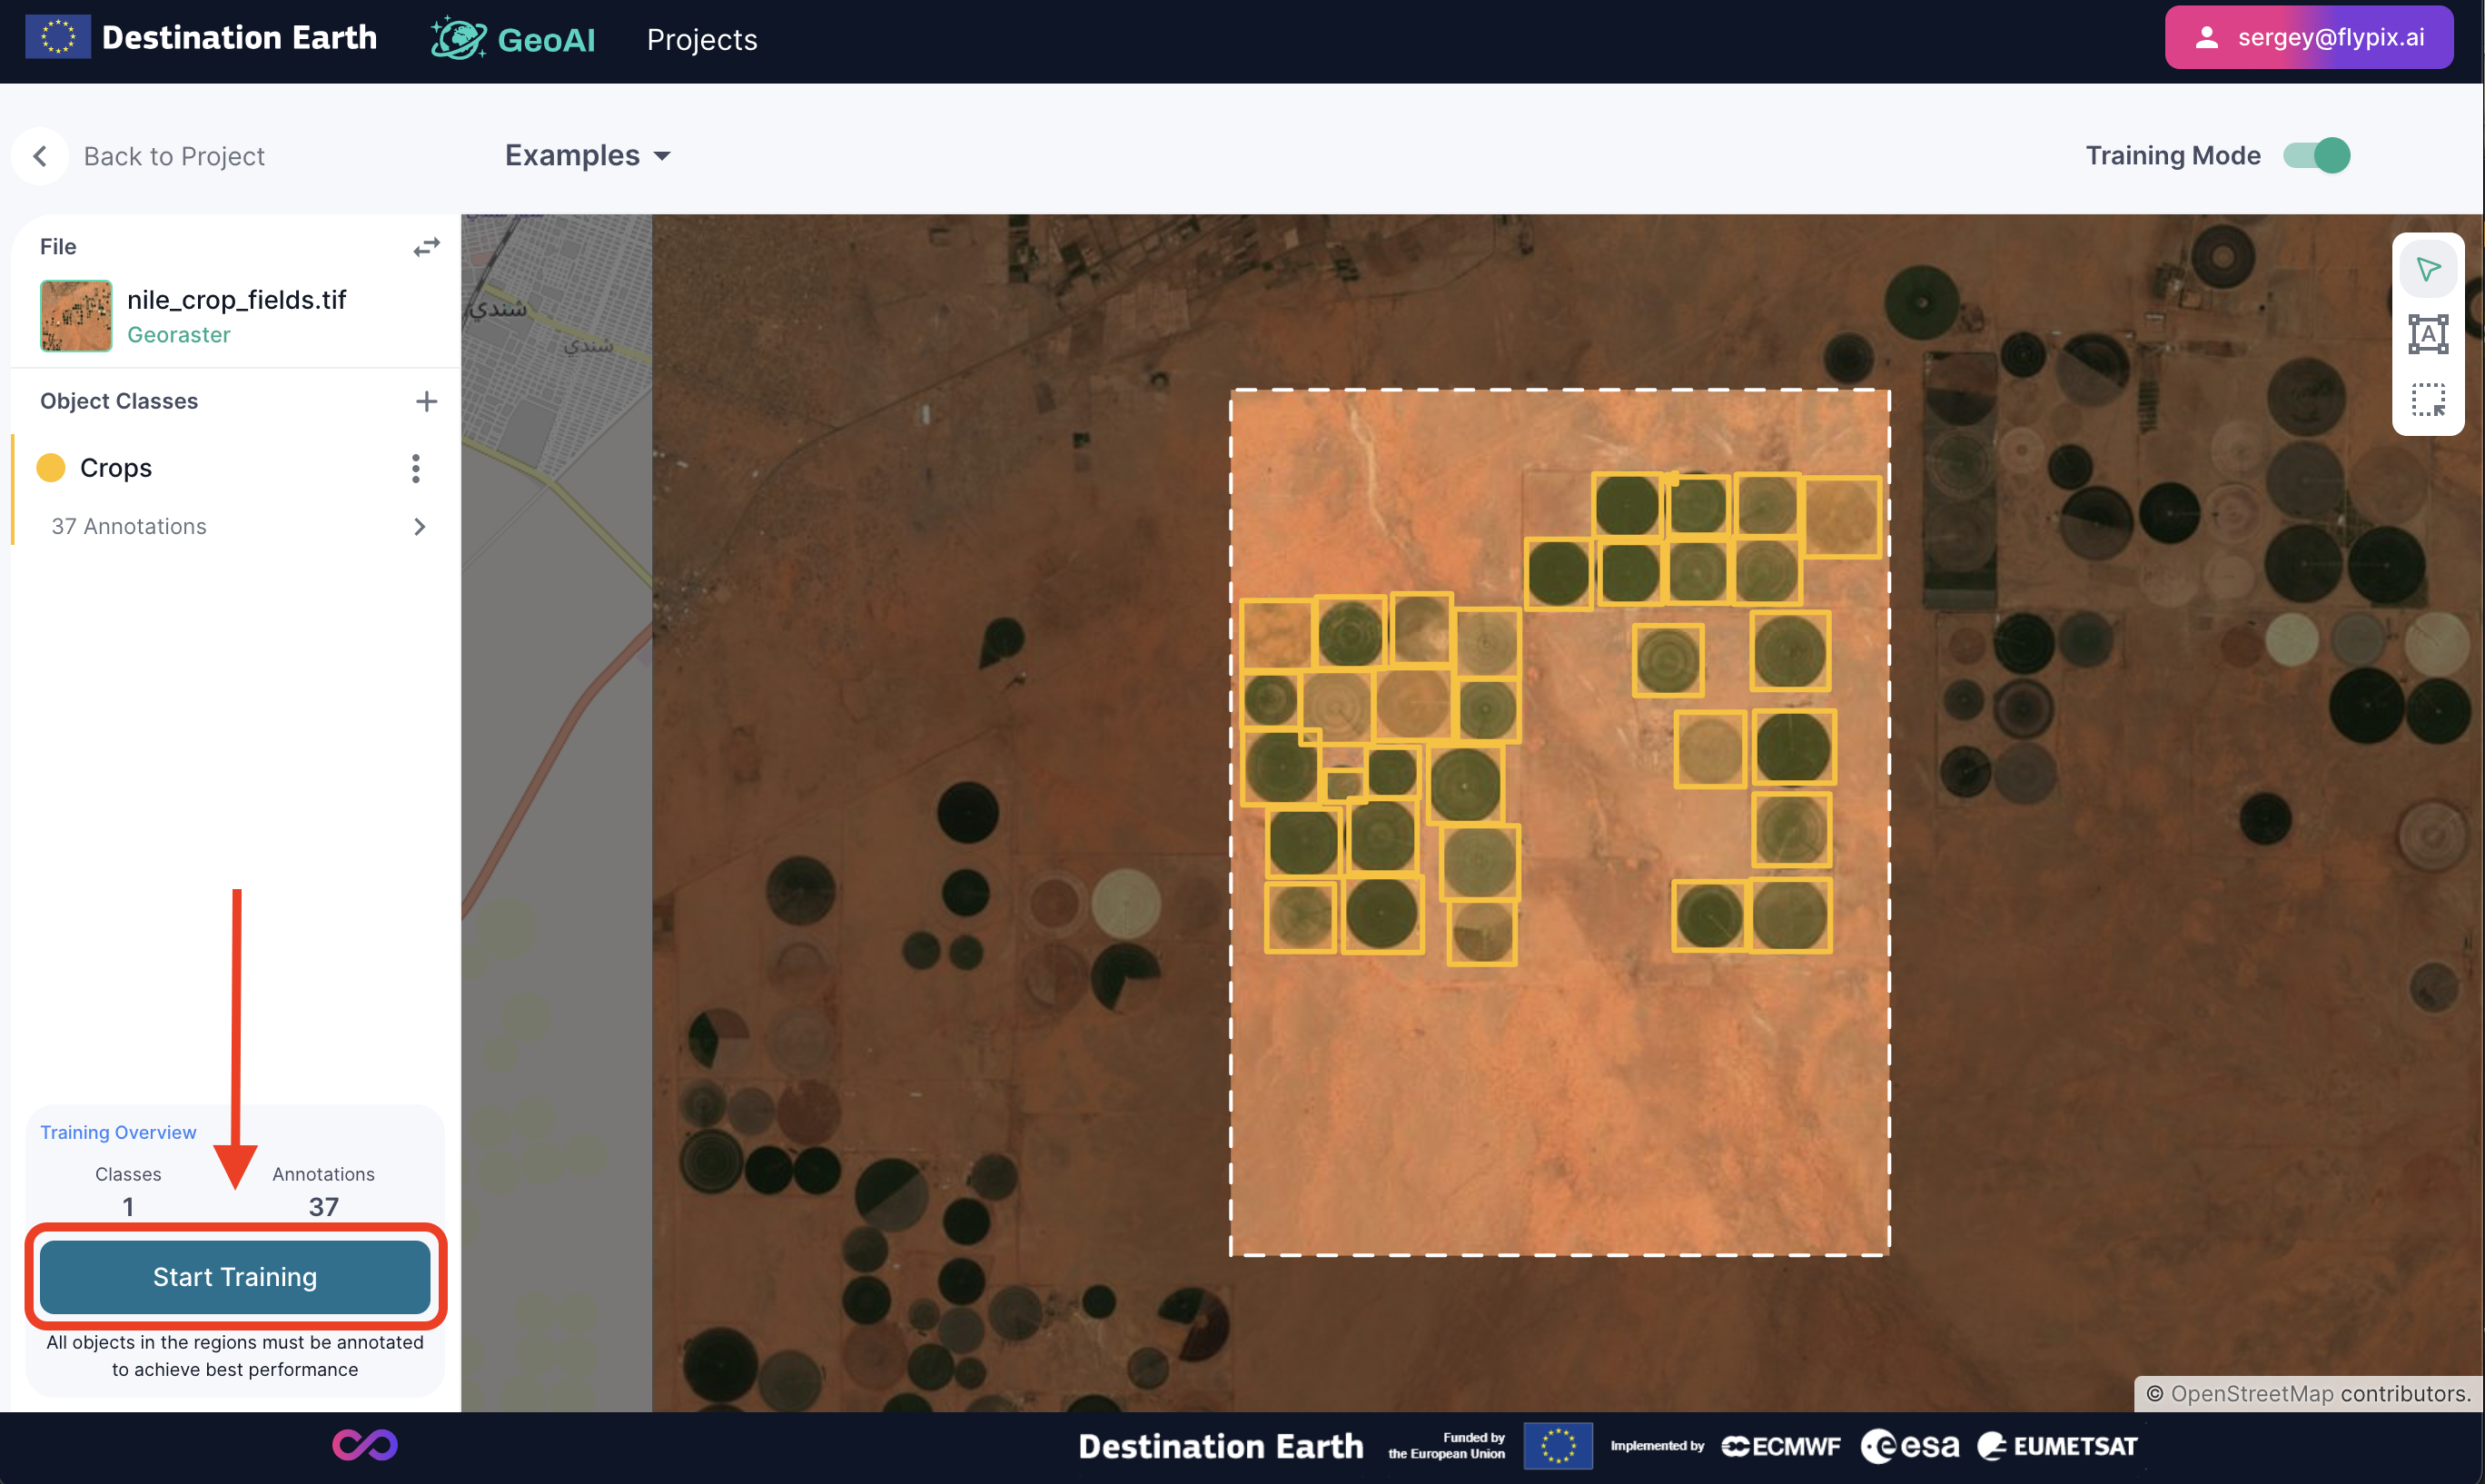
GeoAI will process the data and prepare the AI model.
Step 4: Apply the AI Model
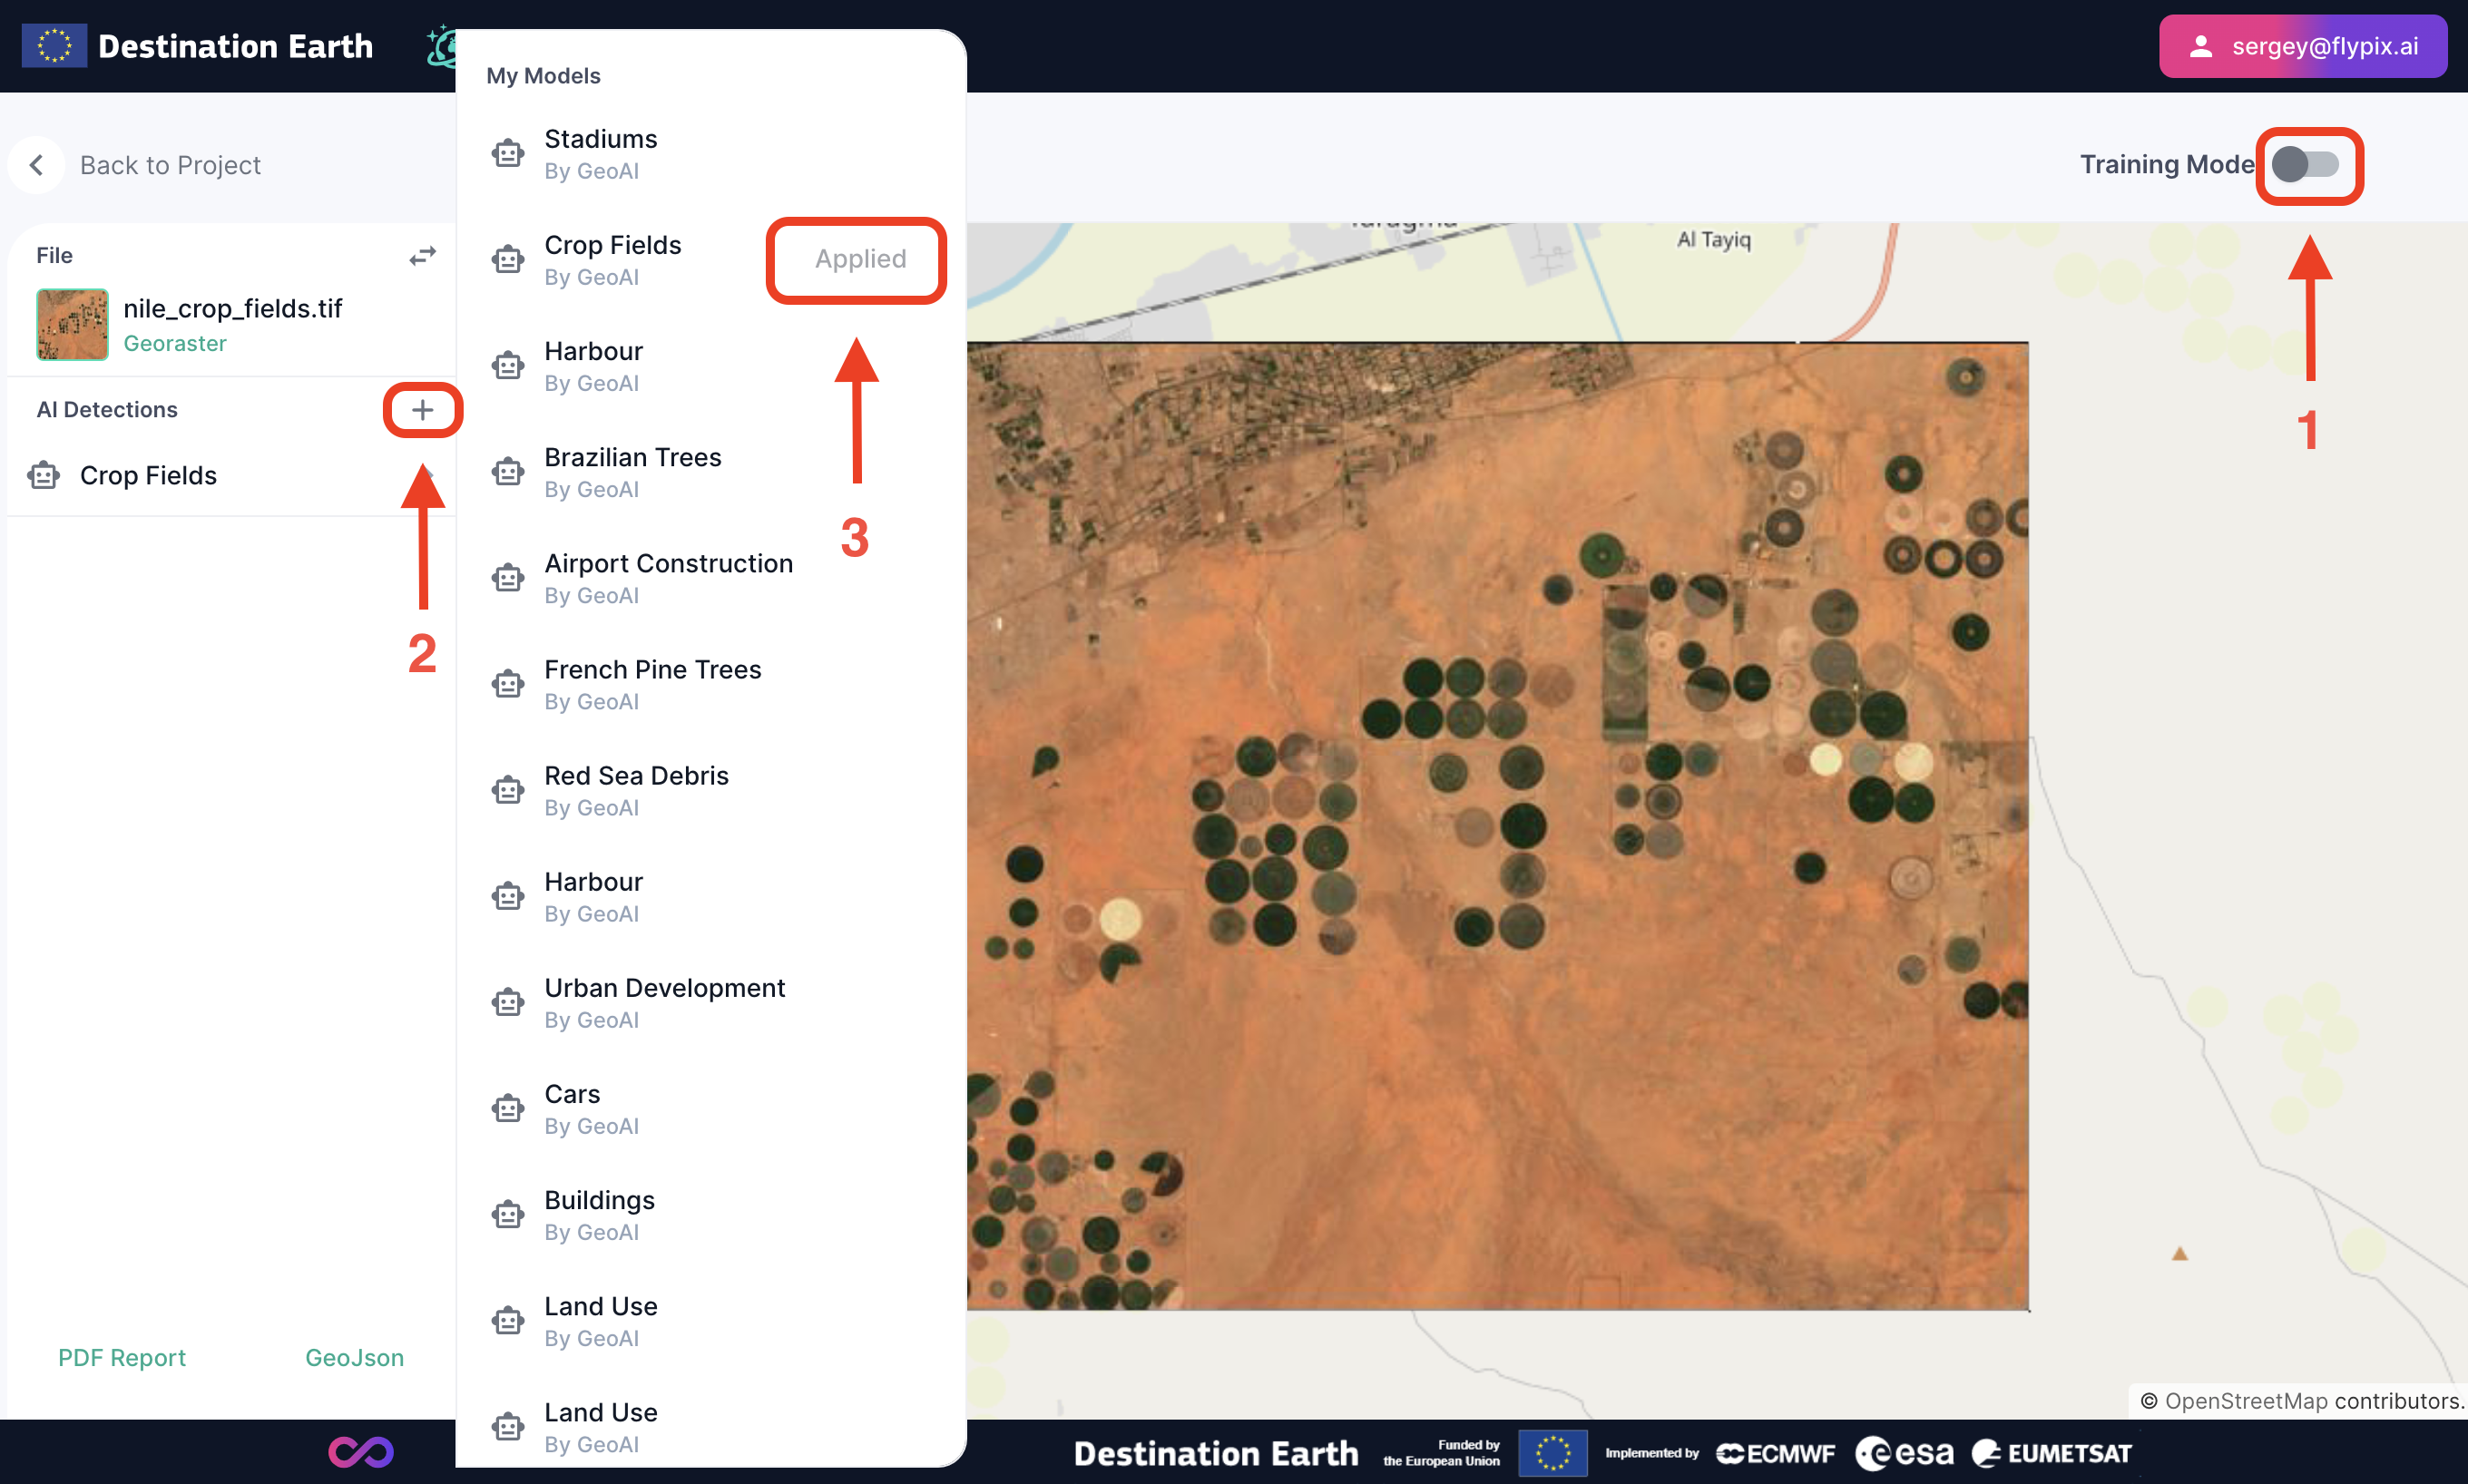
Apply the Model:
Switch-off “Training Mode” (1)
Select (2) and apply (3) the newly created “Crop Fields” model to detect all crops on the raster.
The execution time may vary depending on the size of the raster.
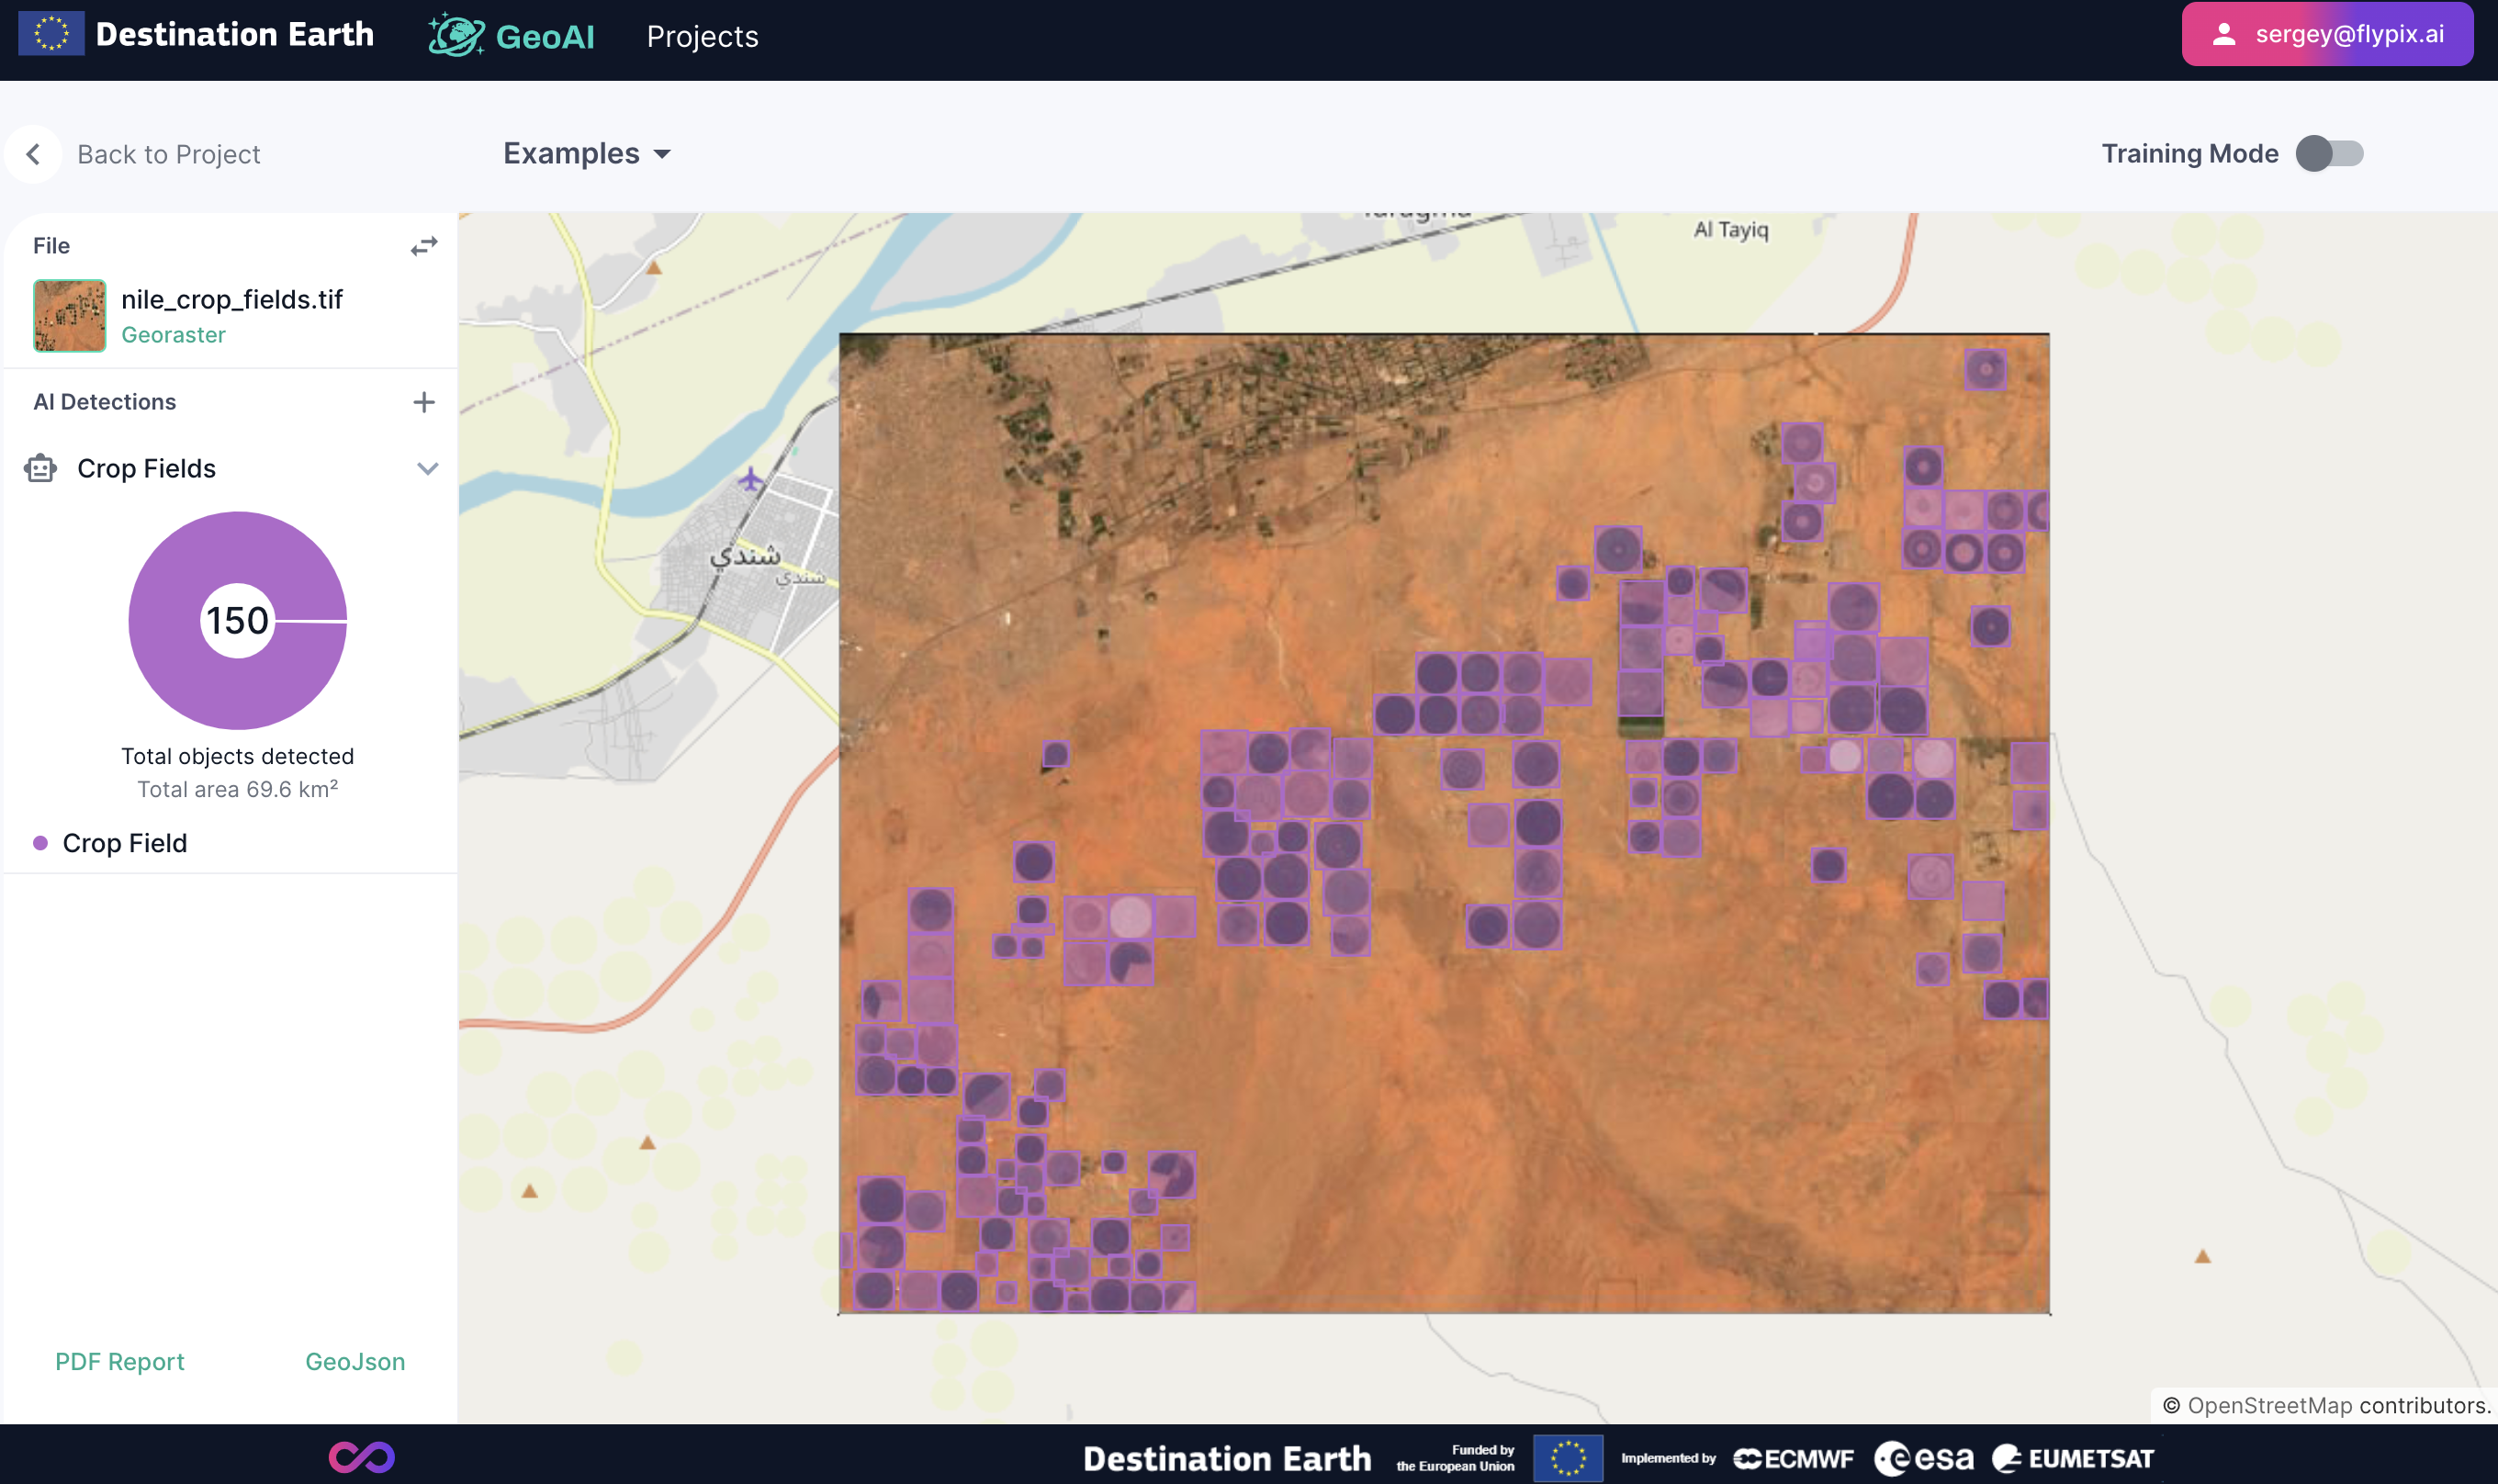
View Results:
Results will appear once the model has completed its run.
Explore the detected crop fields by clicking on each mask or by reviewing aggregated statistics.
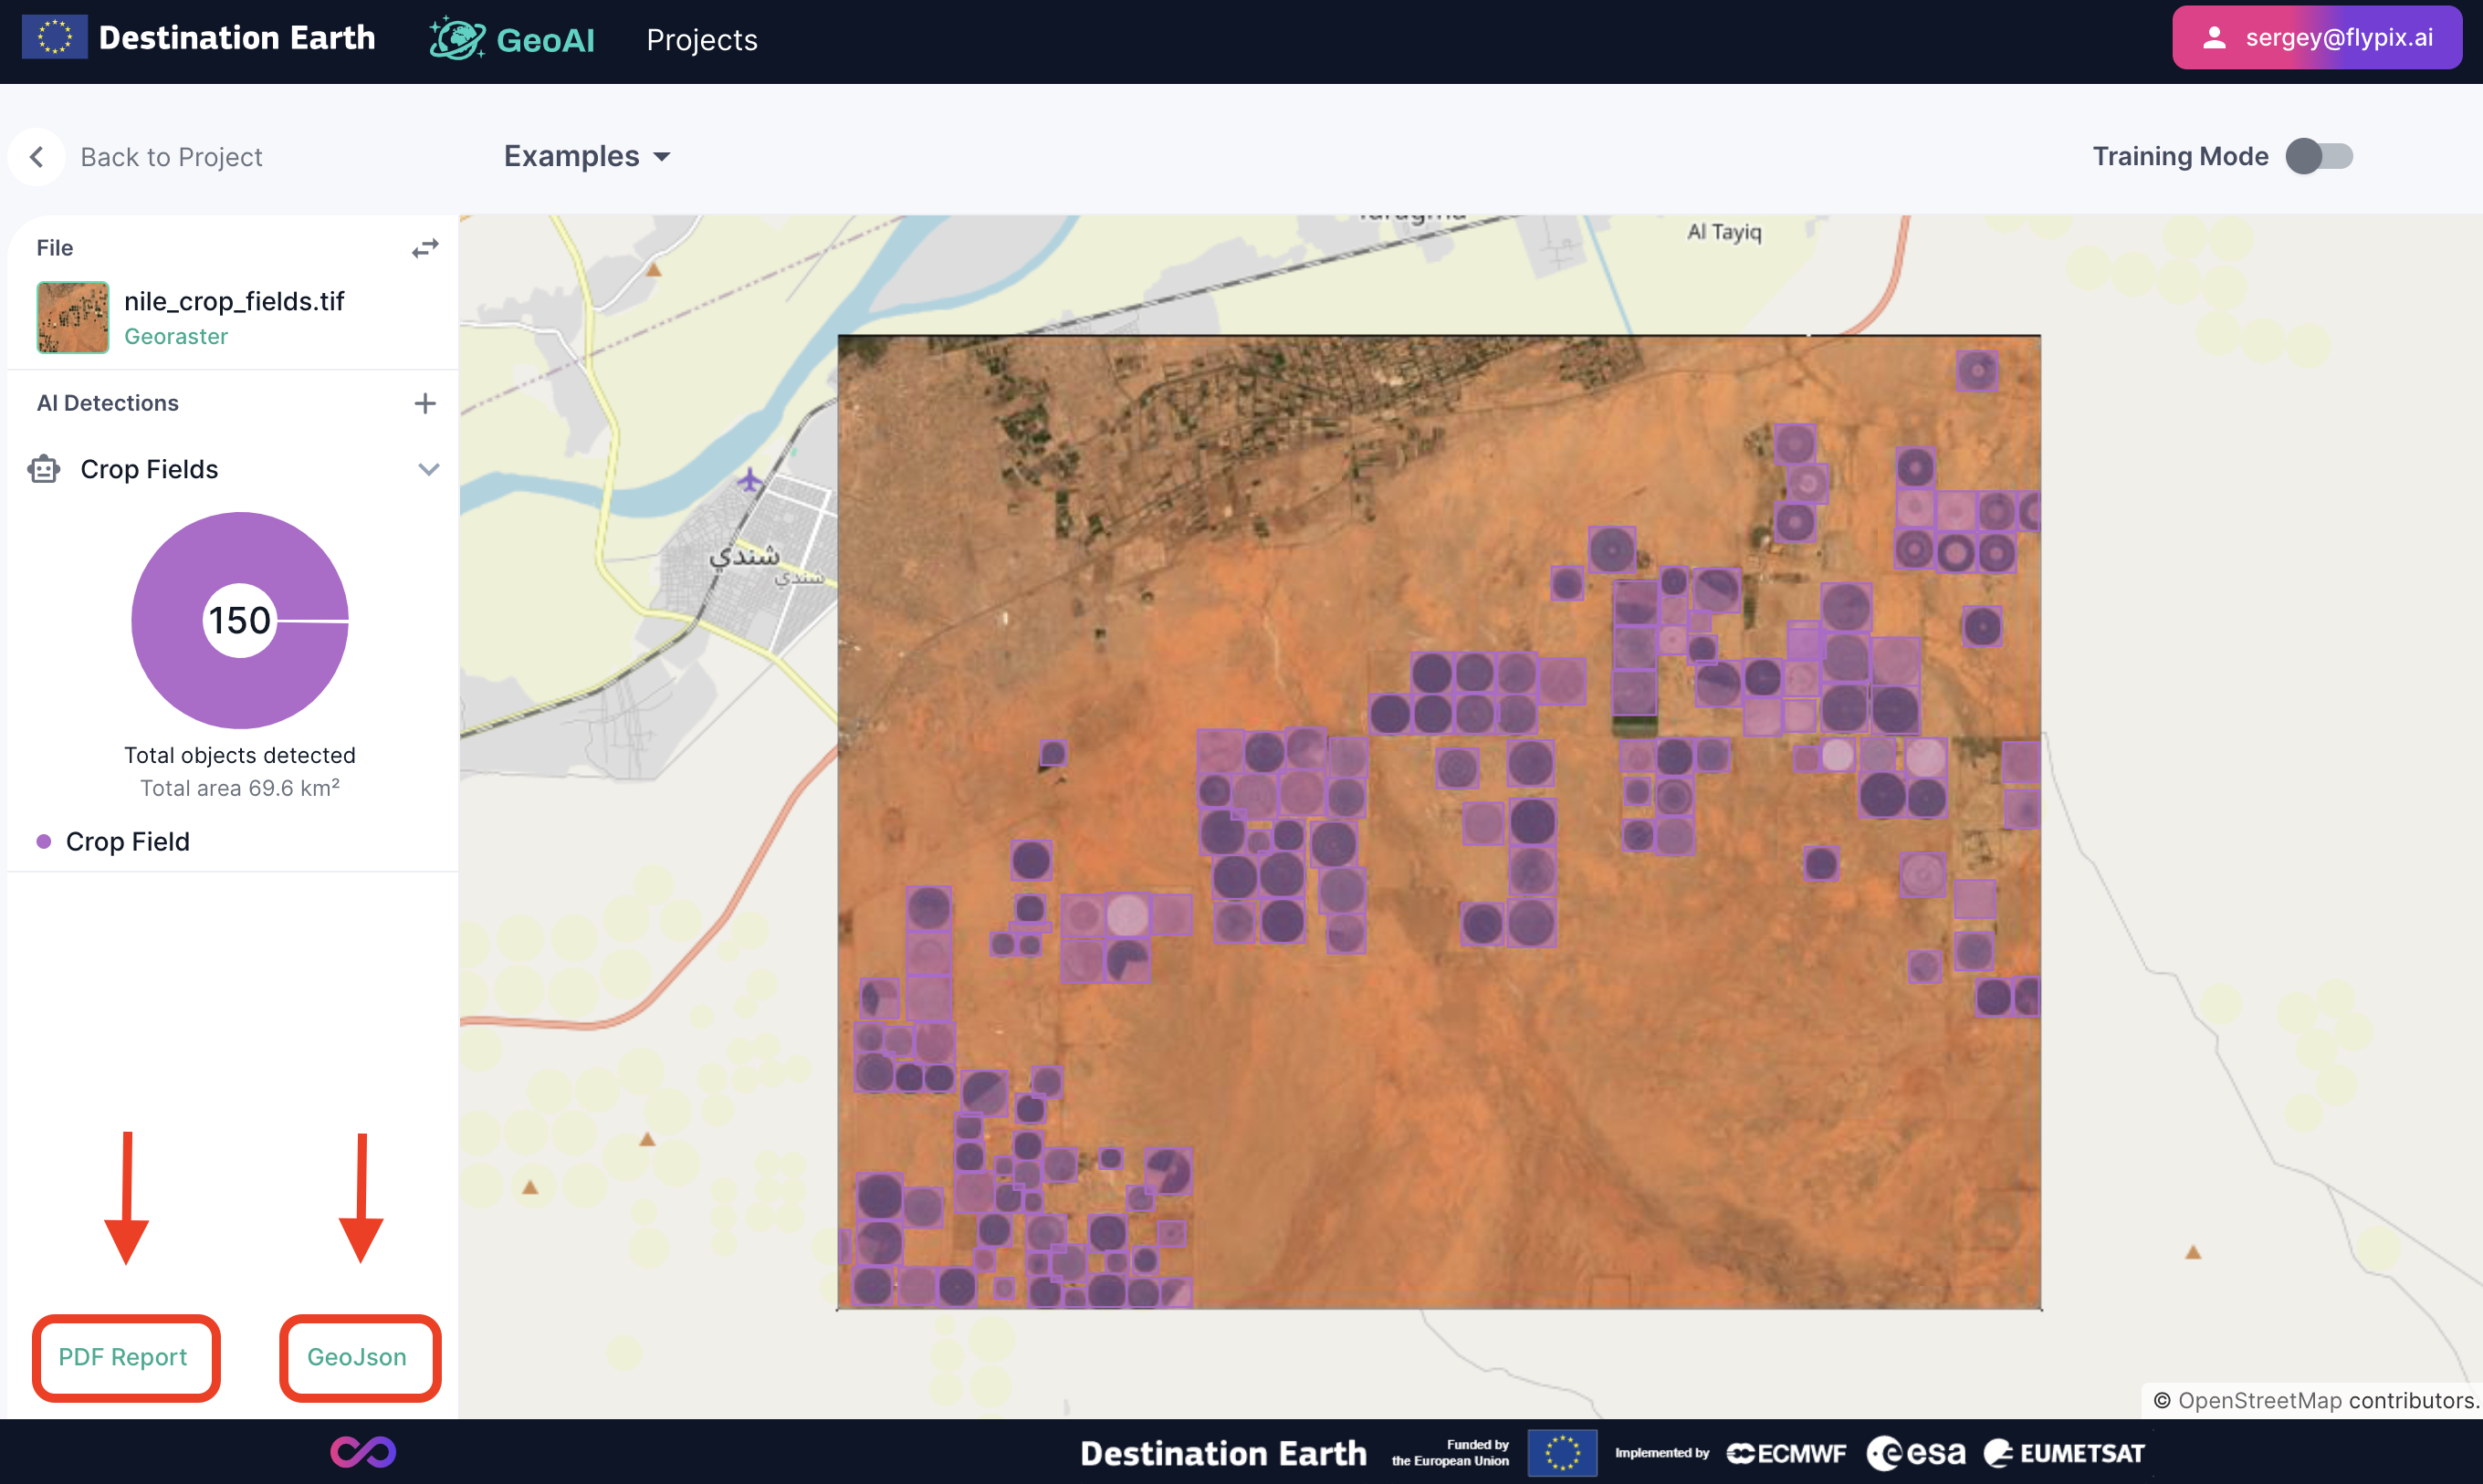
Step 5: Export Results
Download Reports:
Click on the “PDF Report” button to get a comprehensive report of the analysis.
Export to GIS:
Export the vector layer in GeoJson format by clicking on the “GeoJson” button.
Additional Capabilities
GeoAI supports a wide range of applications:
Detect and localize any kind of objects like vessels.
Identify structures like stadiums and oil tanks.
Classify land utilization on large territories.
Explore the numerous features GeoAI offers and stay updated with new functionalities added regularly.
Conclusion
This user guide provides a simple workflow for using GeoAI to analyze satellite images and generate insightful data. For more advanced features and detailed instructions, explore the GeoAI help resources and tutorials available on the platform.